Red Cedar
More apocalypse, less angst
Post #3107: Sewing off the stash

I’ve been doing a lot of finishing and stash sewing lately in an attempt to clear some of the sewing room clutter. Case in point, the over-sized pillow that I finished earlier this week. The teal/red poppy fabric was originally an unfinished (and unflattering) attempt at a skirt, which I then sliced up into quilt squares several months ago – and now finally, it’s done!

The subject of the “stash” comes up frequently in discussions of knitting or sewing. Comparing myself with what I see online – my stash of fabric and yarn would likely be considered neither large nor small – but somewhere in the middle. And still, I don’t like what it represents – which is a tendency to purchase more than I can reasonably consume.
Whenever I start to sew or knit down the stash, I am confronted by how much time it takes to work each piece of fabric into something usable, never mind find uses for all the scraps. Given all the yardage in my collection, I would have to sew every day for a year to get through it all. And there is no way I could knit/crochet all the yarn I have – since knitting is much more time consuming. On the other hand, I like the ability to “shop” my stash when I have a gift to make, or I’m bored of the clothes in my wardrobe. To have nothing on hand would mean continual trips to town, or (more likely) waiting for mail order.
I think the balance is in bringing less material into my house, and ensuring that what I do bring in has some longevity so that even if it takes me a couple of years to use, it won’t feel like it’s from some other moment of my life. I’m also eliminating the purchase of material with Lycra or elastic elements, as I find that breaks down just from sitting around too long, plus it isn’t ultimately biodegradable.
So yes, I’m emptying the bins one project at a time. Progress is slow, but at least it doesn’t cost me anything to sew off the stash.
Post #3106: Basic black

I came to the city for a week of work and shows and have instead caught the flu or something like it. I am cooped up in the condo, too tired and achey to do much more than watch Netflix and knit.
My current project is just this side of boring, a black rectangle knit in stockinette which will be seamed and turned into a poncho once the knitting is done.
The patttern is the Easy Folded Poncho by Churchmouse Yarns and Teas and I made a version of it in the fall which I am in love with (and wear often).
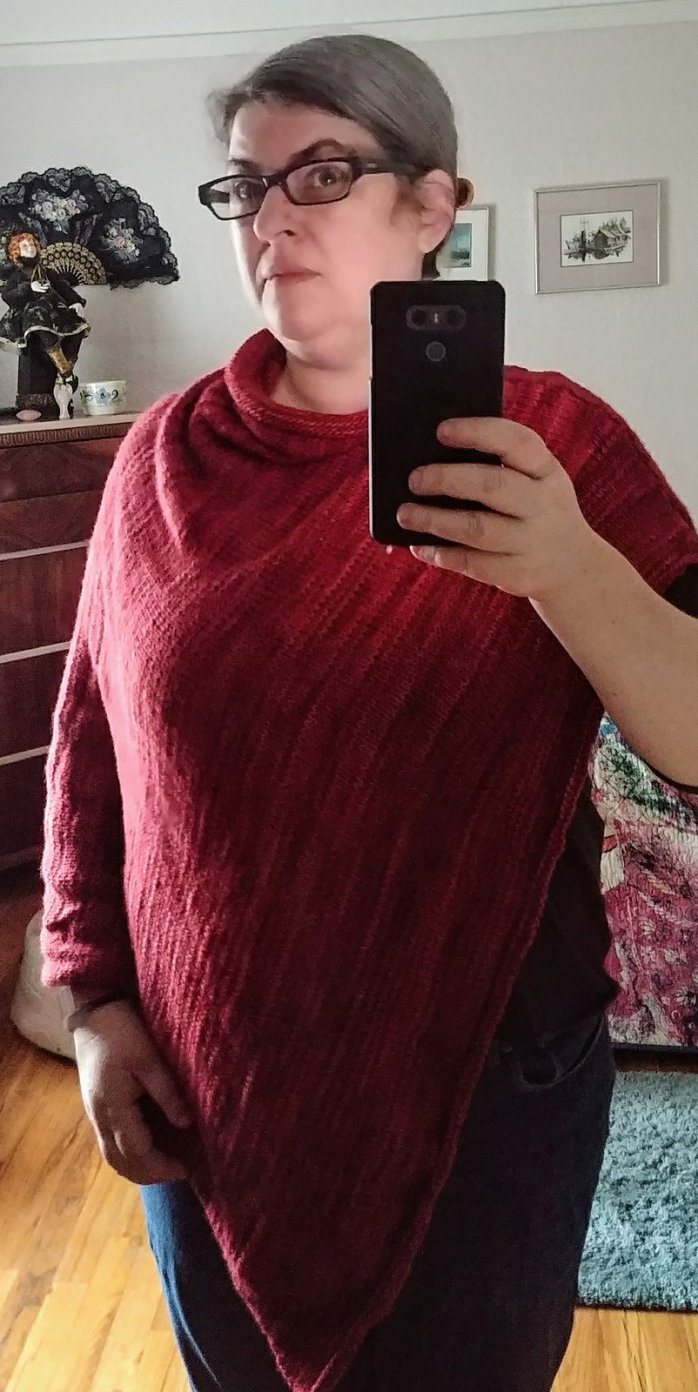
Now I’ve decided to make a version of this for use at meditation retreats which necessitates the black yarn. As uninteresting as it is to knit, I will be very grateful to my hands come November when I have a week long retreat and need something warm to throw on when walking between the meditation and dining halls.
Post # 3105: A roundup of makes from March!

When I moved (almost) two years ago, I moved a number of unfinished projects with me. Like the quilt in this photo. I’ve been carrying the squares and the backing fabric around for about five years – both of which I purchased for next to no money (seriously – I think I spent a total of $15 on the fabric here) – and until yesterday it was just taking up space in a drawer. While trying to clear some space for some work materials, I came across it and another unfinished project stashed away together – and decided that it was just time to get it done. I basically marathoned it yesterday afternoon and evening – fast and not fussy – and although there is nothing measured or meticulous about this project, I have a perfectly serviceable picnic quilt.
What makes it a picnic quilt is the fact the backing is plastic tablecloth material – making it damp proof and easy to wipe clean – which you can see in the turned up corner here:

These are really not my colours – but cheery for spring! I look forward to warmer days when I feel the urge to loll about on the grass.
I’ve also finished a number of other things which I haven’t posted here this month. These include another Webster top in double gauze:

Another Coco dress. This fabric has been in my stash for more than two years, and I wasn’t sure if I would want to pull off something this bright – but with a black cardigan it looks great, and these dresses are the most comfortable wardrobe staple:

A new shawl made using a Party of Five set from Sweet Georgia yarns. Pattern is Starburst – and it took me about two months to knit up:

And I’ve been getting some stitch and reverse applique practice in too:

At the moment, I’m working on a crochet curtain (also using up some of the crochet cotton stash), and trying to decide what projects I will tackle in April. As much as I want to tackle all the unfinished objects and get them out of my studio – I need a certain amount of new makes to keep me occupied. That doesn’t mean new materials though! I’ve got so much stuff in the stash to work with – and I want to clear out some of the clutter before sewing season slows down (I pretty much cease sewing in the summertime because outside is so much more fun). As we are almost onto April I guess we shall see what comes out of the studio!
Post # 3104: Remembering spring

It was very spring when I left Gabriola on Monday. In in Ottawa this week where it is still in the minuses so I’m posting this flower as a reminder that I will be returning to spring in a couple of days.
My carry along project on this trip is a lace curtain panel for our living room which I am crocheting from stash cotton. Although I am daunted by what seems like a long project, it is so far going faster than I expected it would.

Post #3103: Making marks on fabric

Where other people are highly artistic, I feel I am a pretty technical maker. That is, I’m inspired by learning process and technique – not to mention finished usable product – more than expressing a vision or making a statement. Perhaps that isn’t the right way to see the difference, but as much as I disagree with the gendered divide between craft and art – I’m on the side of learning to craft finished objects of use rather than some other kind of (higher) value.
Right now I’m obsessed with the work of Natalie Chanin. This isn’t a first-time crush, I’ve had her books for awhile and have long wanted to make a few garments embellished in the style of the Alabama Chanin brand – but as mentioned in my last post, I’ve recently acquired the Geometry of Hand Sewing, and it’s encouraged me to make a serious study of layered embellishment, which includes stitching practice.
Of all the textile things I do, hand stitching is by far my weakest skill. I’m fine if I have a frame of reference – Aida cloth and cross stitches keep me in a straight line – but once I go freehand all hell breaks loose. I have some disconnect in hand-eye coordination or spatial awareness which means that tidy, even stitches have always eluded me. It doesn’t help that I find it all so frustrating and slow-going that I give up long before getting enough practice at it to ever get better – I have a number of half-finished embroidery projects kicking around to attest to this.
For whatever reason, I keep getting drawn back to hand stitching and in particular would like to be able to apply hand-finished elements to the garments I make. Although I do work with patterned fabrics, a large part of my daily wardrobe is plain fabric items – lots of black cotton knit and denim – and what I like about the Chanin style is that she takes very simple garment designs, made from good-quality plain knits – and gives them a boost with the use of a variety of embellishment techniques. These appliques, beads, stenciled paints, and stitches take a variety of forms – some very showy, some much more subtle – a palette of elements that I would very much like to employ in my own everyday clothes.
And because I don’t do anything in half-measures – I’ve spent the last few days getting right down to it – cutting stencils, practicing with stitching grids (provided in the new Chanin book), and applying both paint and ink to fabrics for practice canvases. One thing that keeps me going is signs of progress, so I am documenting my practice pieces with the use of header cards in order to make a sample binder of techniques and mark my improvement with those techniques. I plan to use the same type of documentation when I start working with dyes later this spring/summer. One thing I’m very thankful for is a studio full of supplies to draw on – as investing in this type of work from the beginning would be otherwise very expensive – I don’t feel nearly so packratty when I actually put long-held materials to use.
The feature photo is of the materials I was working with over the weekend, and will continue to work with: stitching practice cloths, stencils made from heavy watercolour paper (left behind by the former owner of the studio), and textile paints that I bought for some reason or other years ago (they aren’t the highest quality – but will do for practice pieces), and DMC embroidery thread. I also redrafted and cut the Coco pattern into a new version of a knit tank top and plan to use that as a first foundation garment once I’ve practiced a bit more with the stencils and stitching.
All of this – I might add – is technique a la Natalie Chanin, which is what I meant at the head of this post about being more technical than artistic. I have no compunction about admitting that none of this is stuff that I’ve come up with on my own – but is taken directly from tutorials, books, and a craftsy class – and my motivation is is learning technique more than coming up with my own specific style. This is what keeps my continually motivated – the instruction and inspiration from other much more artistic makers – which pushes my own interest in technical skills that eventually get applied in my own life and wardrobe in some less-than-perfect execution.


