Red Cedar
More apocalypse, less angst
Post #2013: The episode in which I’m learning to knit.

The photograph above represents my first ever knitted project – a dishcloth! I mean, a lopsided, mis-gauged, dishcloth – but whatever. I’ve never knitted before now other than a few feeble attempts to learn over the last few years.
To learn anything that involves technical skill (languages, woodworking, playing an instrument, sewing, knitting, etc) requires that one get at least a little bit obsessed during the learning phase – something that has been missing from my previous attempts to become a knitter. This time around I’ve got the bug for sure – I spent most of the day Saturday learning knit stitch and starting this dishcloth (several times), finished the dishcloth yesterday, and started another one on the bus today which has been ripped out to be started yet again this afternoon (I’m working on getting gauge a bit more consistent before I move onto purl stitches). I think part of the reason that I feel like I’m getting it this time is because a knitting friend suggested to me that as someone who crochets, I might find continental knitting (where the yarn is held in the left hand) easier. This makes sense, and it also makes sense that crochet was initially easier for me to learn because I have strong left-hand dexterity from playing the fiddle all my life. I’m clearly right-handed, but my left hand works better for some things that require small muscle dexterity – grasping and tensioning yarn being one of those things.
Anyhow – I’m in the obsession stage of learning and that’s really what you need to get over the hump of making ugly things. For the record, here is the very first crocheted item I made four years ago – see any similarities between the two?
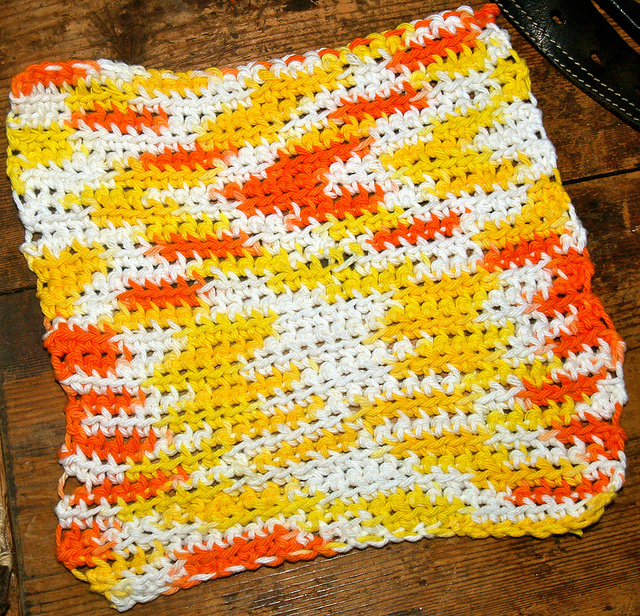
All you can really do at this point is move onto the next project (dishcloth) and hope it gets better. As I recall, the summer I learned to crochet, I made many, many dishcloths and then I made a horribly lopsided blanket out of non-washable wool yarn. So you know – we learn as we go. At least this time I am starting with a familiarity of yarn types and how to read patterns generally – that already makes this venture seem easier.
Looking at this picture of my first crochet is such a good reminder that we have to crawl before we can walk – but if one practices enough, the progress is inevitable. The key here is that we keep on doing something until it gets easier/more intelligible – and that’s the beginner’s hurdle. How much time and brain power do you have and how much does learning this new thing require? It’s not always the right time or place to acquire new skills (or make new habits or break old ones).
But right now feels like the right time to me – I’m also meditating more and reading novels again – which apparently means that post-degree I’ve got a whole lot more brain space for other things again.
Post #2012: All up in your stars….

I’m back from Ottawa after a week of work there, and have a touch of the obligatory airplane cold to prove it…. but at least it’s Friday and despite my little sniffles, I will end this day in my backyard with a beer in my hand. I present you with a photo of a starfish – taken on Flores Island almost seven years ago (it makes me sad that it’s been that long since we went there)…… Happy weekend everyone 🙂
Post #2011: Long live the ugly quilt.

So. The ugly quilt is almost finished – I completed the hand-tying last night and trimmed the edges – which puts me at the last step of binding. It’s been ten years since I started this puppy – a queen-sized quilt that I could never love enough to get to the end of. But the cabin has given it new life – because this is exactly the kind of bed covering you want in a casual place: nothing too lovable, nothing too precious, warm and extra-snuggly (I used a heavier-than-normal quilt batting on this project). Also, these colours won’t look dirty anytime soon – which reduces the number of times it will need washing in any given year.
My goal at this point is to finish this before our next cabin trip (first weekend of June), and also to get proper foam pads for our sleeping cots – my biggest problem to date at the cabin is that the pads on our cots (really old camping inflatables – one that I’ve had for a dozen years and the other is one I found washed up on a beach) are so uncomfortable that I have trouble sleeping and I think it’s time to get sheets and a coverlet rather than bed down in sleeping bags any longer.
After this little project is finished, I’ve got to get on the graduation/moving-into-residence-in-the-fall quilt for my step-daughter. I had hoped to finish it by her graduation date (mid-June) but these last couple of months have been busier than anticipated (not to mention warmer) and I’m just at the starting place with that one. Fortunately, she doesn’t need it until September!
Post #2010: Anticipating a cabin-y summer

Last week, after the epic cocktail party, we hit the road first thing the next day (after I took the glassware back to the party rental place). Destination: Link Lake – where the ice has now melted and spring/summer is well underway.
Not much to report really, except that we met the building inspector (who happened to be in the area when we arrived on Monday), got Internet installed (thanks to China Creek Wireless – great customer service), met our builder to discuss work for this building season, and lit up the new woodstove and “cured” the paint. We also hauled a cast iron sink up there for later use, and Brian did a bunch of cleaning up of building scraps and garbage which we hauled off to the dump in two loads.
Work planned for this summer includes: Loft, deck and stair railings, insulation, exterior cladding – plus two inspections: framing and insulation. Next summer will involve some interior finishing, and exterior painting. The summer after that will likely see the end of major interior finishing the then we will have to deal with the question of water/septic/plumbing in order to pass final inspection. It’s really a five-year project in terms of money and time (each year allows us to pay off more of the line of credit for the next year) – but now that I have broken it down in my mind this way, it seems a lot less overwhelming. Also, we are at the point where we have a very usable structure for summer (electricity, stove, roof, basic cooking gear set-up), and after the insulation is in, will also be winter-ready – which means everything else can get done on its own time.
And for the record, this week marks two years exactly since I saw the ad for the property on Landquest, next Monday will be two years since first saw the property. We haven’t done so bad for ourselves to go from overgrown lot with a fallen-down cabin/tipped-over outhouse – to a place where we can sleep inside or set up tents (we have two tent platforms plus a level front yard now). It’s definitely going to be as much time as possible at the cabin this summer!

Post #2009: How to throw a drinking party (with recipes!)

This blog has been a bit meditation-post heavy in the last few weeks – for which I am not at all sorry – but since we just threw a party for Brian’s birthday, and it was an afternoon-cocktail-themed-affair, and I invented two new drinks – it just seemed time to share those recipes for posterity (and some info about how to throw such a party). Meditation is important work, but so are social gatherings – and I intend to continue with the celebration of both in my life!
First of all, if you are thinking of doing an afternoon cocktail party, here are some tips:
- This is an expensive kind of party to throw – booze (especially in Canada) is pricey. I planned my drinks several weeks in advance and split the party cost over three paycheques.
- The best, most awesome drinks, include special ingredients or housemade infusions. This is another reason to plan ahead – your basic fruit liqueur takes about six weeks (minimum), and even a quicker infusion like earl grey liqueur or straight up tonic syrup may call for special ingredients, or require time to make. Planning ahead by at least two months is preferable if you want to do anything special.
- Rent glassware – it’s pretty cheap to do and you don’t have to wash anything before returning it. Also rent cocktail plates, ice buckets and any other barware that you wouldn’t use in everyday life. This keeps refuse to a minimum and really helps the cleanup!
- You need a minimum of two ice buckets – one for ice and one for whatever you want to keep on ice (in our case there were many prosecco drinks).
- Definitely you will need help during the party because no matter how much glassware you rent or own, you will run out. No one keeps one glass for the entire party. Enlist your friends to wash glasses, they will oblige because – free drinks!
- Choose only 4-6 drinks that you are prepared to make, print out a sign with ingredients so that people can see what is in them, and make that available in a number of places for people to consult. You cannot afford to set up a bar for everything. I went with six drinks, many of which shared ingredients. Also, pick things with ingredients that go with the weather (in our case, prosecco was a big hit and I used herbs in season that were growing in our garden).
- Also – bartending – you do not want people free pouring, so be prepared to bar tend and arrange in advance for a couple of people to spell you off in advance. Create a sheet of drinks with recipes to aid the process. People might be daunted at first, but a lot of people enjoy being behind the bar – it creates a different kind of social interaction.
- Bartenders need to keep drinks poured at the right levels, otherwise you will run out of booze too fast and people will get drunk. We were very successful with this – and I realized how much of a difference proper bartending made to the event.
- You definitely need bar towels, water (if you aren’t near a sink), and a large vessel (garbage can, pickling crock) for liquids and other refuse.
- Have lots of ice on hand.
- Be prepared for some people to stay late and have some basic dinner fixings on hand (we did that, but then our friend ordered pizza instead and that was equally amazing). Also – serve ample grounding foods throughout – bread, cheese, olives, veggie platter, etc. People will eat it all and it cuts down on drinking on an empty stomach.

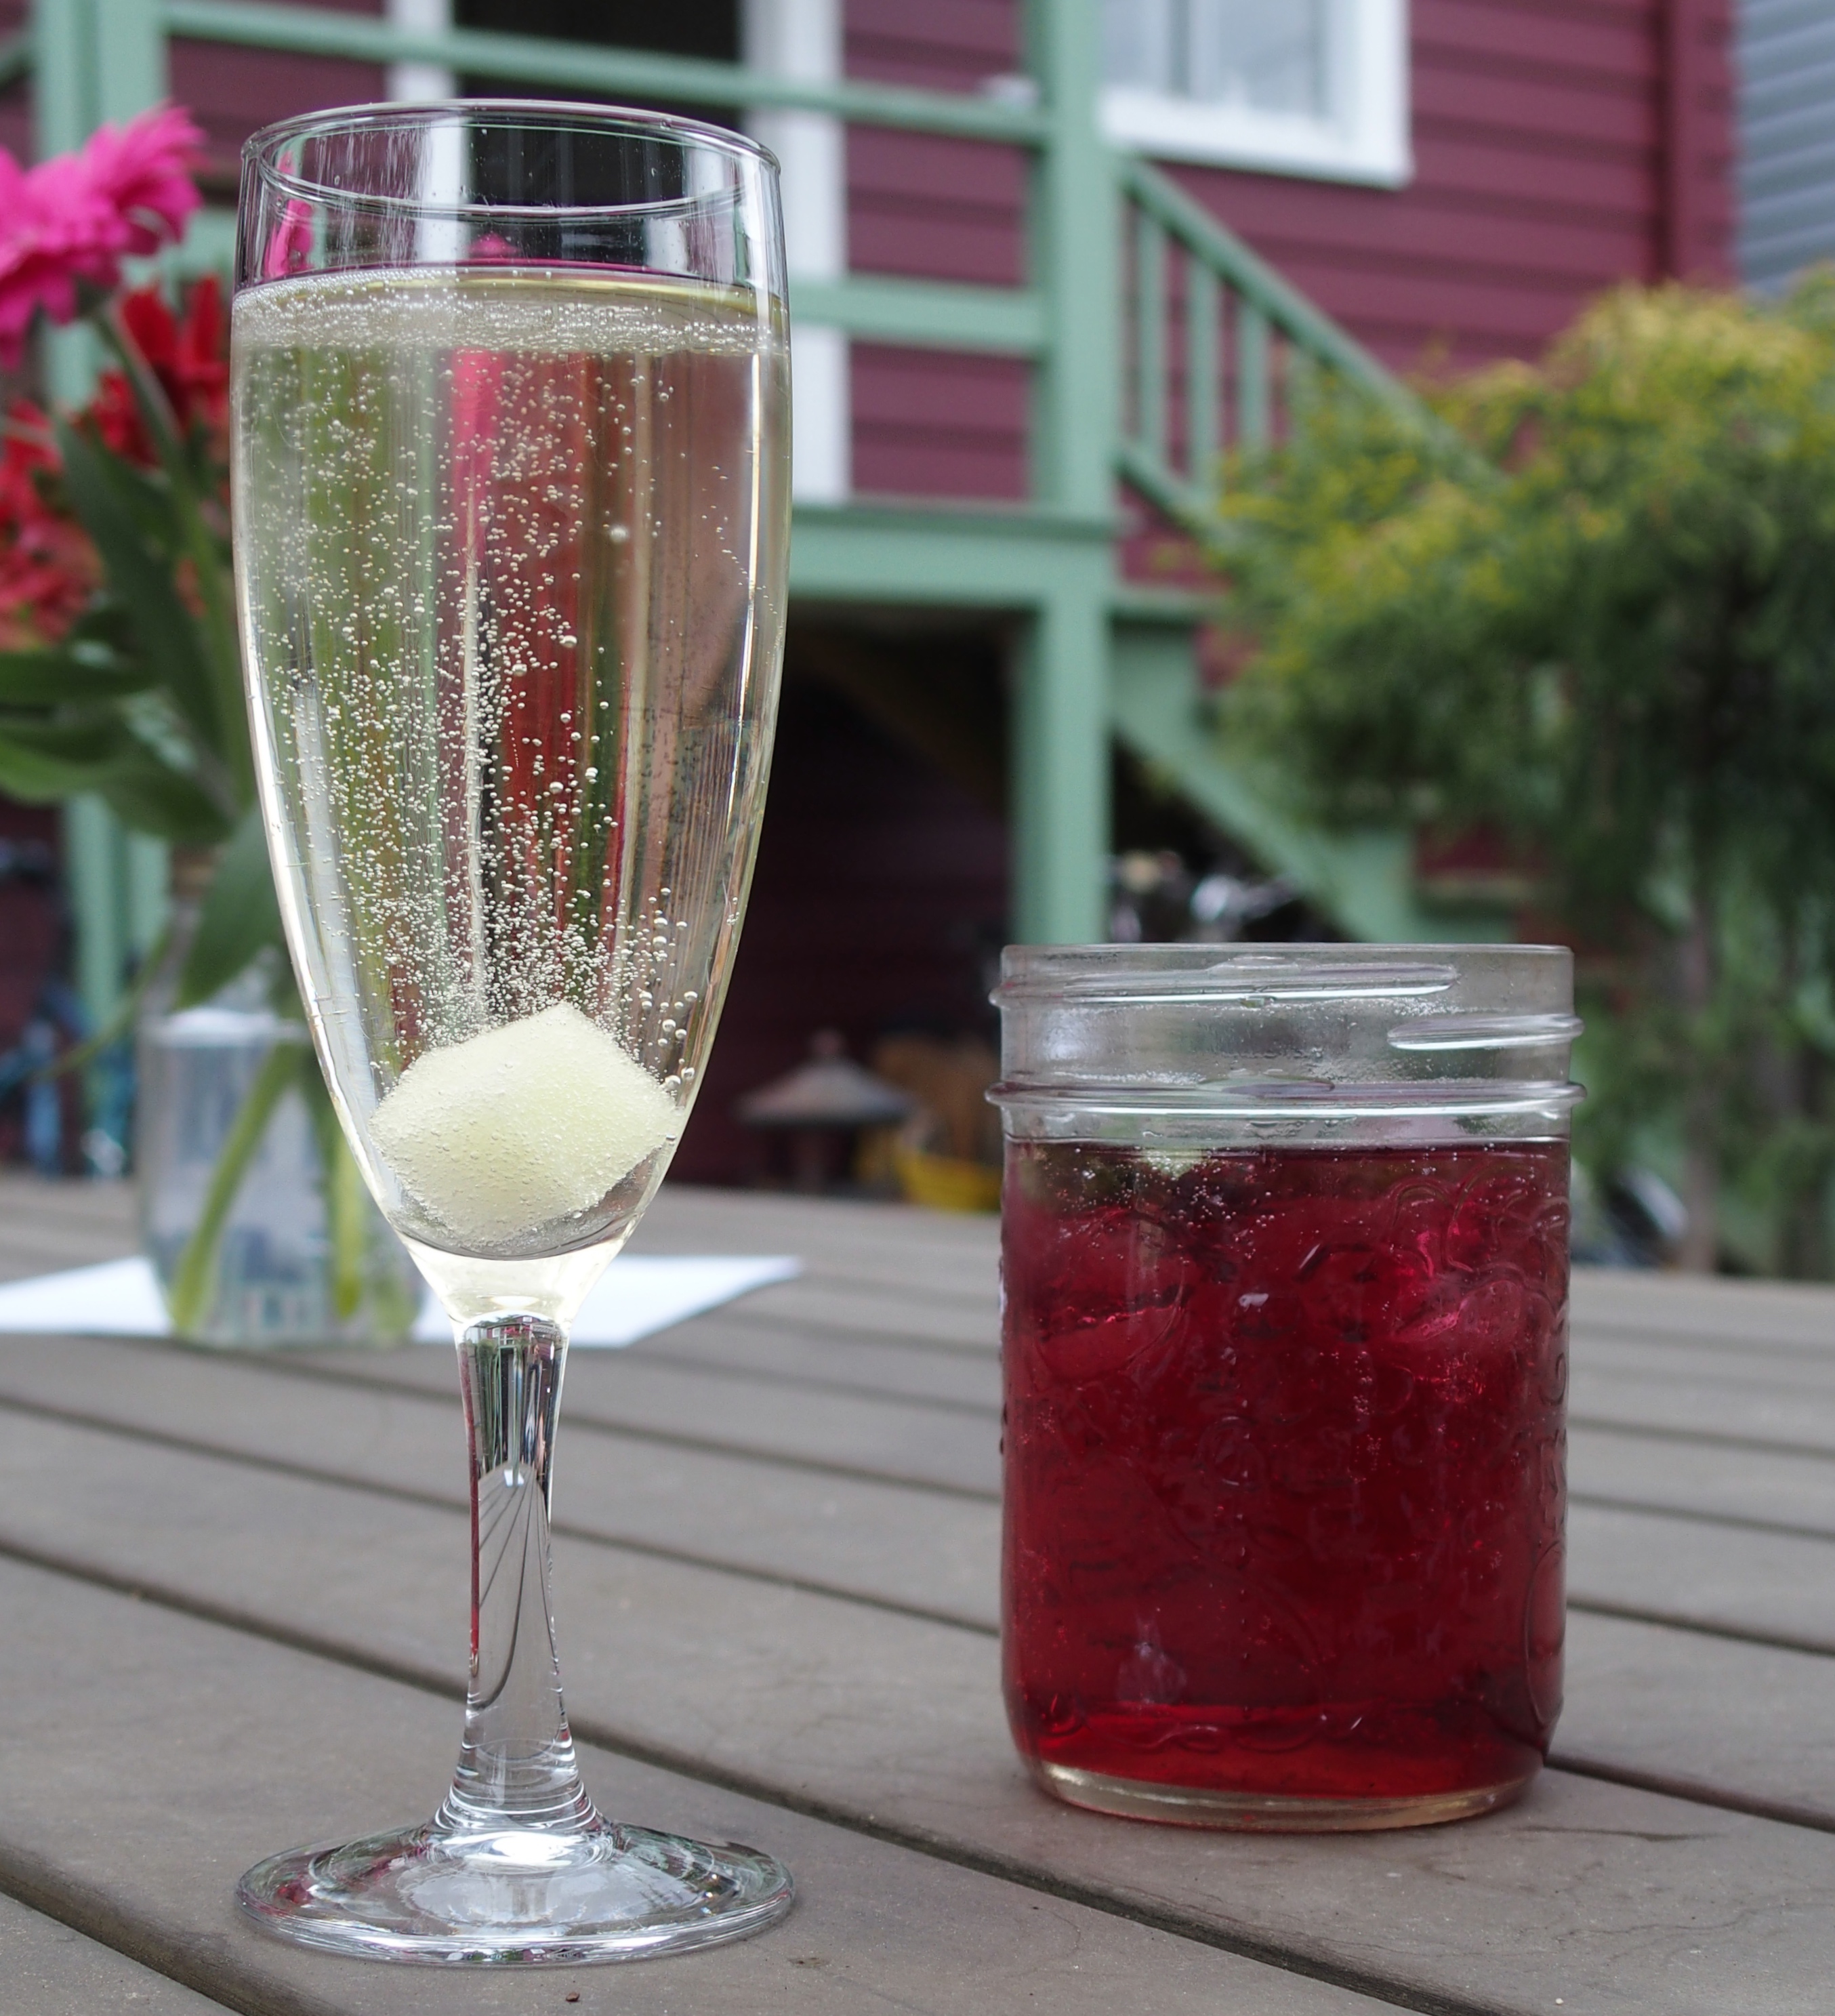
We are very lucky to have a backyard studio/guesthouse/meditation room – so we set our bar up in the studio because the day was warm and it kept people in the yard as opposed to cramped in the house. The drinks on the menu were the Afternoon Marteani, Orange Blossom, Iced Amarula, Gin/Vodka and housemade tonic, French 75 and the Urban Crow. (The bolded ones are my own concoctions. The photo at the head of this article is the martini, the Urban Crow is pictured alongside an Orange Blossom below.
The Urban Crow Cocktail
- Served in a jam jar (250 ml)
- Wipe rim with sage leaves and then muddle four leaves in the bottom of the jar
- Add two ice cubes
- One shot blackberry liqueur
- One shot gin
- Finish with soda
- Stir
The Afternoon Marteani
- Served in a martini glass
- Dollop 1 teaspoon of blood orange (or other citrus) marmalade in the bottom of the glass
- Pour 1 shot vodka, 1 shot earl grey liqueur into a shaker with ice
- Shake
- Strain contents of shaker into glass over the marmalade
(I think this martini is my favourite new thing – the earl grey liqueur is outta this world, and the jam flavours the drink subtly and wonderfully throughout the drinking experience).